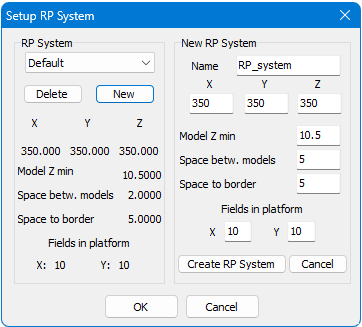
Setup RP-System (not available with the Free Viewer and in EXE files)
Use this assistant in the RP-Layout tool to create new RP-systems.
In the  RP-Layout tool, click the Setup button to start Setup RP-System.
Select RP-System
Select a RP-system from the dropdown list. The properties of the selected RP-system will be displayed. If there are no customized systems, the list will only contain the Default system.
Click OK to apply the selected system.
Delete
Delete the currently selected RP-System. The last remaining system cannot be deleted.
New
Opens the New RP-system input mask to specify the properties of the new RP-system.
New RP-System
Name
Enter a name for the new RP-System
x, y, z
Enter the values for the dimensions of the new RP-System. Values between 1 and 1000 are accepted .
Model Z min
To auto-position models, enter the minimum distance of the models above the RP-platform. Values between 0.001 and 100 are accepted.
Space betw. models
To auto-position models, enter the distance between models. Values between 0.001 and 100 are accepted.
Space to border
To auto-position models, enter the distance of the models to the borders of the RP-system. Values are accepted between 0.001 and 100.
Fields displayed in platform
For the guide grid of the RP-platform enter the number of fields in X and Y direction. Values between 1 and 100 are accepted .
Click the Create RP System button to create the new RP-System.